Creating Data Links
Data links in Fileglancer allow you to create shareable URLs for your data on Janelia’s file systems without moving or copying files. They work similarily to how Google Docs does when you share a document with “Anyone with the link”.
What are data links?
Section titled “What are data links?”- Persistent URLs: Stable web addresses that point to your data
- No data movement: Links point to data in original locations on the Janelia file system
- Internally shareable: Can be sent to internal collaborators or used with online tools on the internal network
- Revokeable: You can delete a data link at any time to revoke access to the data
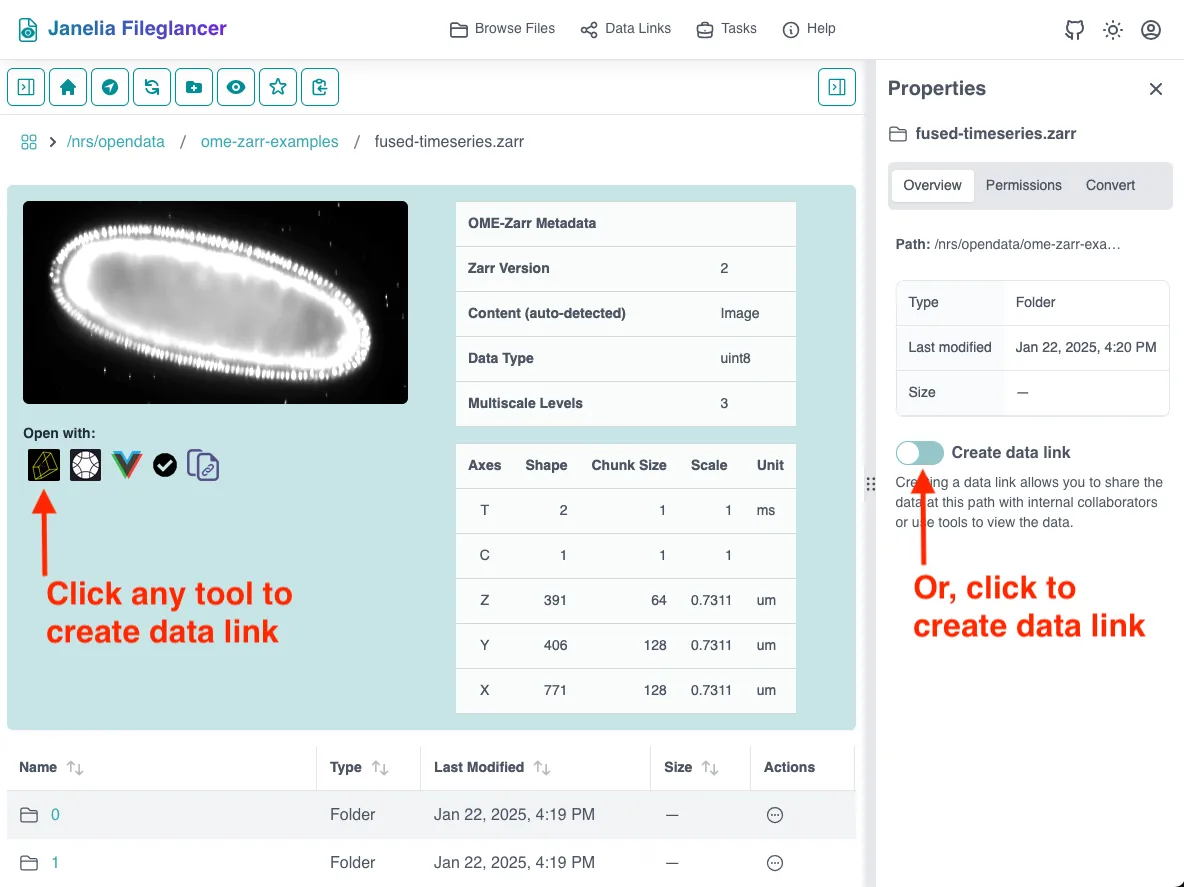
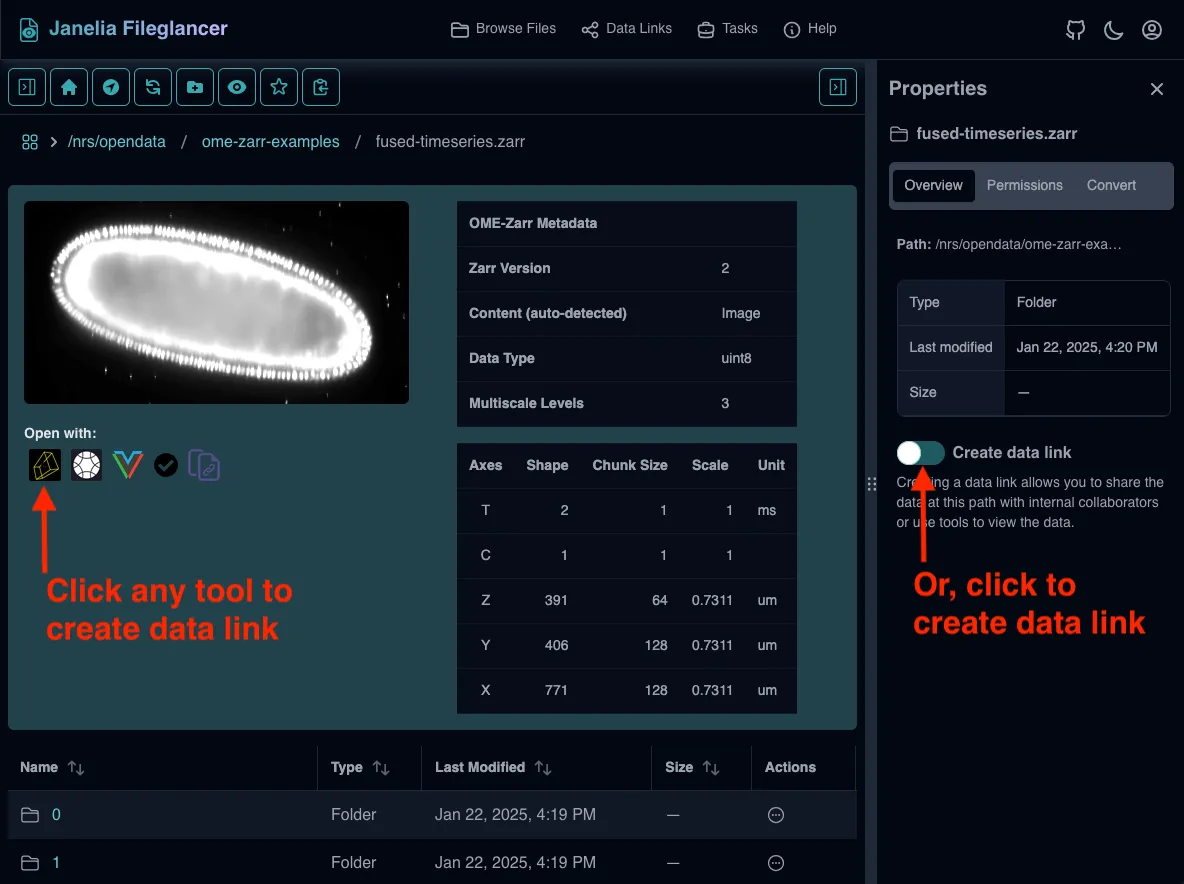
Creating data links for OME-Zarr Data
Section titled “Creating data links for OME-Zarr Data”Zarr and OME-Zarr data sets have special integration features for data links:
-
Navigate to your Zarr directory
Browse to the target Zarr or OME-Zarr directory. -
Click one of the tool icons under the image thumbnail
Select one of the available tools, including Neuroglancer, Vol-E, Avivator, OME-Zarr Validator, or copy link. If you don’t have automatic data links enabled, this will open the data link creation dialog. -
Review the data link creation dialog
The dialog shows information about the link being created. Review the access settings. -
Approve the data link creation
Click “Create Data Link”. Choose the “enable automatic data link creation” option to streamline future link creation. -
Share the generated data links
When you open the data in a tool, it uses the data link to access your data. Certain tools, such as Neuroglancer, also save your viewer state in the URL. You can copy the URL in the address bar and send it to a collaborator and they will see the same view of the data.
Creating data links for non-Zarr data
Section titled “Creating data links for non-Zarr data”You can create data links for any directory, not just Zarr files. This is especially useful for other image file formats such as the Saalfeld Lab’s N5 format.
-
Navigate to the target directory
Use any navigation method to reach the desired folder. This can be any directory you have appropriate permissions for. -
Open the Properties Panel
Ensure the Properties Panel, located on the right side of the interface, is visible. -
Access the Overview tab
Click on the “Overview” tab within the Properties Panel. This shows general directory information and controls. -
Enable data link
Find the data link toggle switch in the Overview tab. Click the switch to enable sharing for this directory. The switch indicates whether sharing is active. -
Use the generated link
Copy the generated URL for sharing. The link provides access to browse the directory contents, and can be opened in compatible viewers such as Fiji.
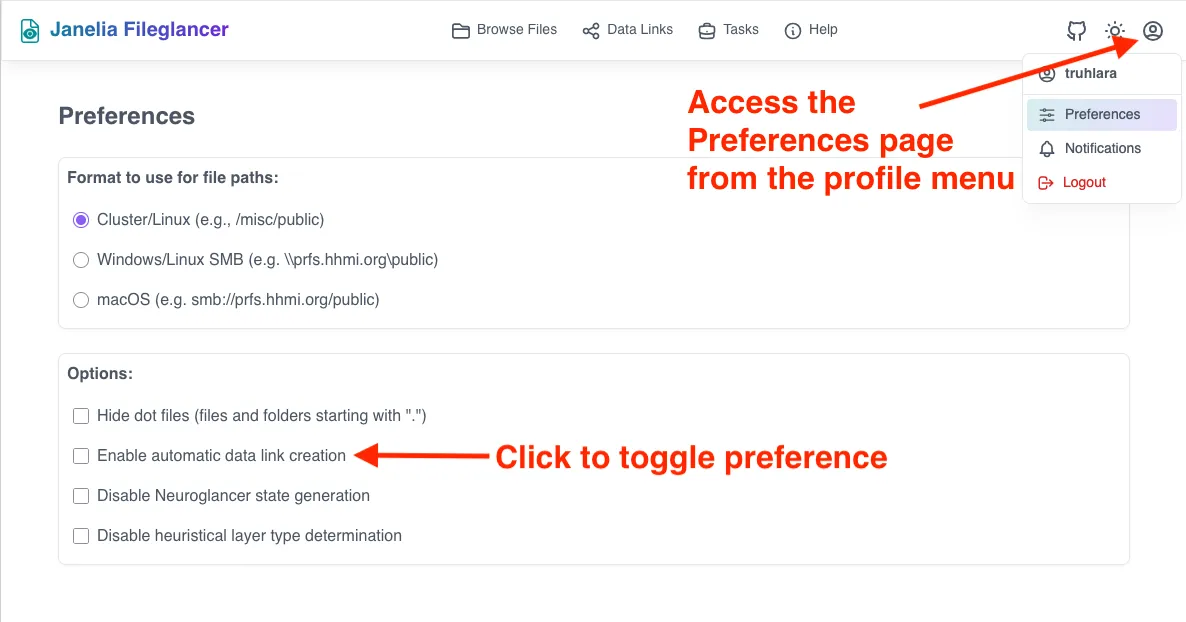
Automatic Data Link Creation
Section titled “Automatic Data Link Creation”When creating data links through the tool icon dialog:
-
Enable automatic creation
Choose the option to enable automatic data links during the approval process. This will remove the dialog confirmation step for future link creation. -
Managing automatic settings
Review and modify automatic data link settings in your preferences at any time. Disable automatic creation if you prefer manual control.

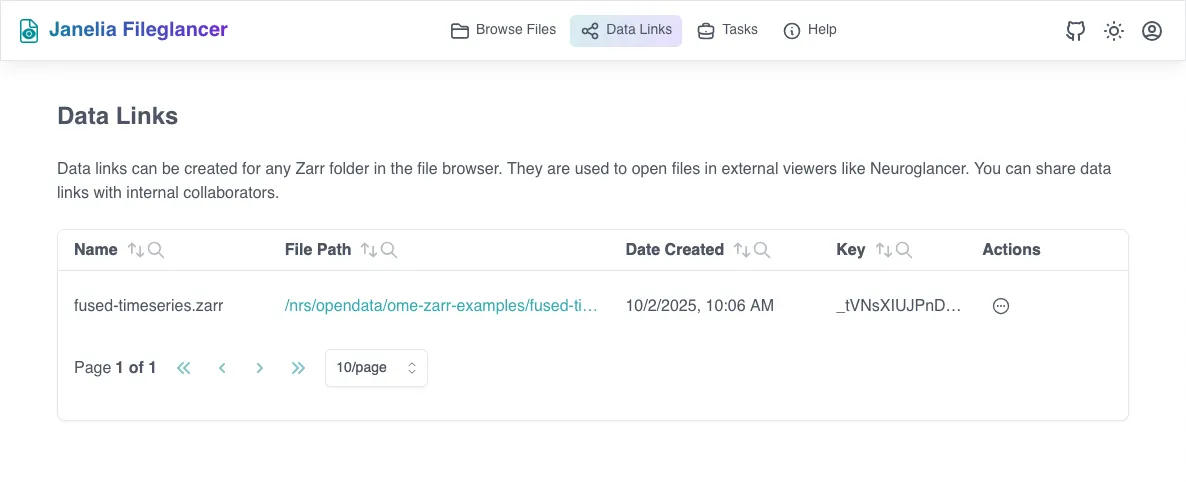
Managing Your Data Links
Section titled “Managing Your Data Links”Viewing All Data Links
Section titled “Viewing All Data Links”- Navigate to the data links page
Click on the Data Links page link at the top of the interface. View the table with all currently active data links. Sort and filter links, if desired.
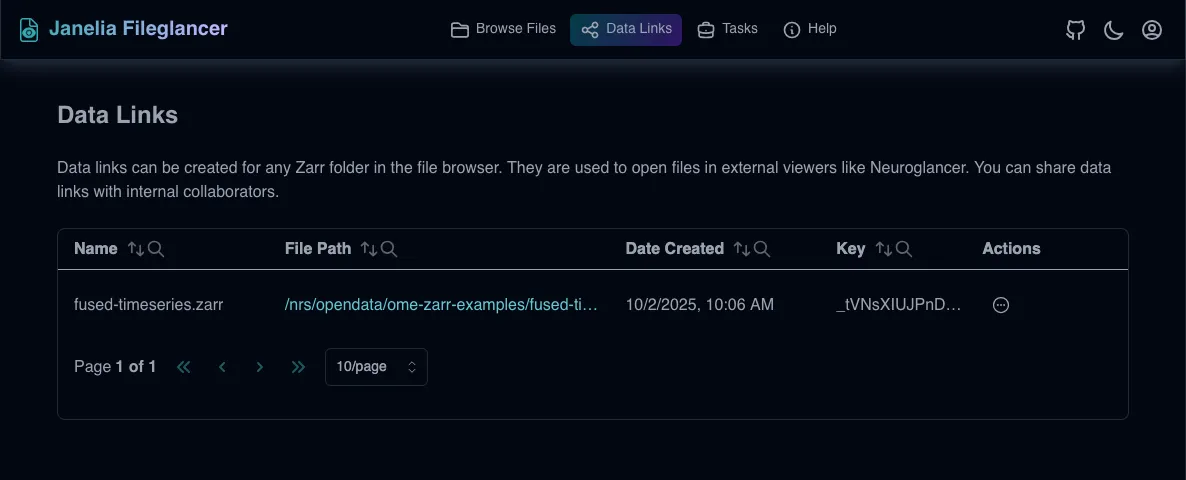
Disabling Data Links
Section titled “Disabling Data Links”Method 1 - From the data links page
Section titled “Method 1 - From the data links page”-
Click the actions button
The circle icon with three dots on the right side of the data links table. -
Select delete data link from the pop-up menu
Confirm deleting in the link in the dialog.
Method 2 - From the Properties panel
Section titled “Method 2 - From the Properties panel”-
Navigate to the linked directory
Use navigation to return to the directory with an active data link. -
Open Properties Panel
Access the Overview tab as before. -
Disable the data link
Click the toggle switch to turn off the data link. The link will immediately be deleted. If you re-enable the button, a new data link will be created. Therefore, collaborators who received the previous link will not be able to access the data until they receive the new data link.
Security Considerations
Section titled “Security Considerations”Understand access scope
- Anyone with the data link and using the Janelia network can view directory contents
- Be aware of what data is included in shared directories
Disable data links that are no longer needed
- Regularly review data links on the Data Links page and delete them if they are no longer needed
Sharing data outside of Janelia
Section titled “Sharing data outside of Janelia”Some file shares have a special folder called data_external. Any files or folders placed inside data_external are automatically made public on s3.janelia.org. You do not need to create a data link in Fileglancer for these items, since public access is already available. Whenever you open a image inside a data_external folder in Fileglancer, you will get a link that anyone on the internet can use to access the data.
Troubleshooting Data Links
Section titled “Troubleshooting Data Links”Data Link Creation Issues
Section titled “Data Link Creation Issues”Problem: Toggle switch doesn’t respond
- Solution: Verify you have write permissions for the directory
- Check if you’re authenticated properly
- Try refreshing the browser
Problem: Properties Panel not visible
- Solution: Look for panel toggle buttons in the interface
- Check if the panel is collapsed or minimized
- Try different browser window sizes
Data Link Access Issues
Section titled “Data Link Access Issues”Problem: Collaborators can’t access data links
- Solution: Verify collaborators have network access and updated data links
- Check if they’re on the correct network (Janelia internal)
- Confirm the data link is still active on your Data Links page
Problem: Data links stop working
- Solution: Check if the data has been moved or permissions changed
- Verify the data link wasn’t accidentally disabled
- Contact system administrators for file system issues
Remember that data links are a powerful feature for collaboration, but they should be used thoughtfully with consideration for security, permissions, and data management best practices.